|
Building a Whelping Box
by Frank Holbert I heard the call for a new whelping box a year before we bred the bitch so I had time to think about it. I have made the best whelping box ever (IMHO), and it looks good too! I've seen a few others and taken the best of them all, but the pig rail is all my idea. First off, everything I used was purchased at the Home Depot. I know people make them larger but three other people I talked with find 4'X4' them just right. The bottom of the box is made from 4' X 8' X 3/4" press board (cheep plywood) cut down to just under 4'X4', with a white Formica like finish on both sides. Use a fine tooth plywood blade when cutting this material. The blade get dull fast so buy two. The sides of the box are the same material except I used 2 pieces of 2' X 8' press board with the Formica like finish on both sides and the edges/ends. Normally the price of this material would have been about $85 for all three pieces, but I found some that had a damaged corner and the cost was reduced to less than $40. I didn't care because later I covered the corners. The welping box sits on 2" X 4"s so it's 1 1/2" off the ground. I screwed the bottom to the 2" X 4"s, then the sides ran down past the bottom and also screwed sides into the side of the 2"X4"s. I counter sunk a few screws into the end grain (if I can call it that) of the sides to hold during construction. In the front I cut a 16" wide door, 10" off the bottom outside ( about 8" off the bottom inside) and saved the piece for later use. Now the box is together.
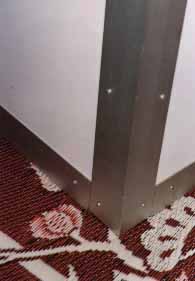
Over by the screw department (I looked everywhere) Home Depot has aluminum angle iron and channel iron. This is light stuff and has a nice brushed finish on it. I got 24" of 1 1/2" X 1 1/2" X 1/8" angle iron and 8' of 3/4" X 1/8" channel iron. The channel iron is made to fit over 3/4" plywood.
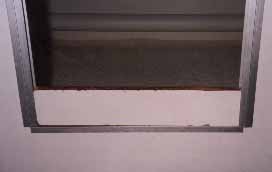
I cut the channel iron to fit around the door opening on both sides and the bottom, it laps back onto the plywood to hide the cut I had made in the press board, that is, to hide the area that is now without Formica. On both sides of the opening I cut another piece of channel and installed it back to back with the first piece so now the channel iron looks like an "H" when viewed from the top. Remember the piece of press board I saved? I then cut it down just a little so it slides into the "H" for a door so as the puppies grow, so will the door height.
I cut the second piece of 1 1/2" X 1 1/2" X 1/8" angle iron into two pieces and put it on the bottom of the box on the the sides to hid the screw holes. Just for looks, it did nothing more. With some white bathroom caulking I sealed all the inside bottom corners, the inside side corners, and the screw holes on the bottom (floor) piece to prevent leakage.
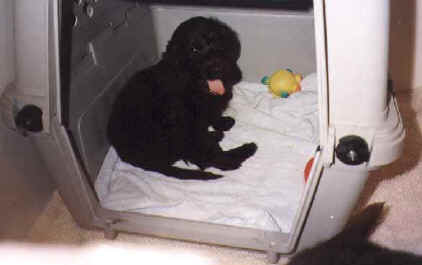
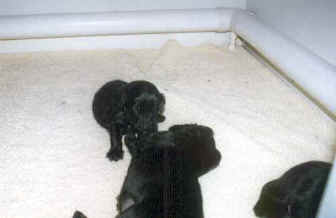
Adrienne bought some fake lambs wool and cut four pieces that fit into the bottom of the whelping box. After the first litter we made two more. The cut ends have to be sewed up. When one gets dirty we just pull it out, put a fresh one in and wash the dirty one. Under the lambs wool we put packing paper bought at U-Haul to soak up the `baby pee pee'. At first I used newspaper but the ink was so dirty that I was happy to buy the packing paper. When the lambs wool is installed the box looks great because it covers the only visible counter sunk screw holes. Now the pig rail. I looked at a lot of things but somehow using bare
2"X4"s did nothing for me. When I have seen 2"X4"s used before it was
always stained up with blood, poop and of course `baby pee pee'. After a lot To clean the box, I remove the puppies of course. Remove the pig rail. Remove the lambs wool and the packing paper. With a spray bottle of 25% bleach mixed with water I wipe down the box and the pig rail. The Formica surface and the PVC pipe is real easy to clean. New packing paper, fresh lambs wool, drop the pig rail in, then the puppies. Cleaning time? Maybe 5 minutes tops! We kept the whelping box and puppies in a back bedroom, ok it's my office. I put a layer of plastic over the off white carpet throughout the bedroom. Over that I cover the floor with bamboo dog show mats. I bleached the mats of course and they didn't loose color. Then I set the whelping box on that. Now mom can get out of the box, get away from the puppies and lay on the mats without staining the carpets . I found mothers milk to be very hard to clean from the carpet. We place a baby gate accross the office door. We have now used this whelping box for three litters. It works great. One down side to my design. It's heavy, I have to get a neighbor to help me move it in and out of the house. Like all whelping boxes what do you do with it until the next year? I stand it on edge in the garage and use it as a Christmas stuff storage shelf.
Updated 09/27/98 |
 of thought, I went with
3" white PVC drain pipe. The light stuff like you use around the yard for drainage.
It's cheep and easy to clean. I used the light gage stuff because the schedule 40 has
larger radius 90 degree couplers that leave a large gap between the corner of the box and
the coupler, a gap that I was afraid a puppy might get caught it. The light gage stuff has
real tight 90's. I cut and glued the pipe so it fits tight into the whelping box, it's not
attached to the whelping box, it just sits in it, a real plus when cleaning the box. To
hold it up off the floor (6 " to center of the pipe) I screwed a 1/2" schedule
40 cap to the bottom of each 3" 90 degree coupler, then glued a short piece of
schedule 40, 1/2" into it for legs. A added bonus I hadn't counted on, the pig rail
legs hold the lambs wool down!!
of thought, I went with
3" white PVC drain pipe. The light stuff like you use around the yard for drainage.
It's cheep and easy to clean. I used the light gage stuff because the schedule 40 has
larger radius 90 degree couplers that leave a large gap between the corner of the box and
the coupler, a gap that I was afraid a puppy might get caught it. The light gage stuff has
real tight 90's. I cut and glued the pipe so it fits tight into the whelping box, it's not
attached to the whelping box, it just sits in it, a real plus when cleaning the box. To
hold it up off the floor (6 " to center of the pipe) I screwed a 1/2" schedule
40 cap to the bottom of each 3" 90 degree coupler, then glued a short piece of
schedule 40, 1/2" into it for legs. A added bonus I hadn't counted on, the pig rail
legs hold the lambs wool down!!